Introduction
This will show how to run Angular 4 from SpringBoot tomcat server. Angular CLI uses Webpack technology and allows to bundle all Javascripts and CSS files into couple of files and this will make easy to run the application from Tomcat Server.
Reference
What is @RestContoller Annotation
Below statement from the Spring Documentation.
Creating REST Controllers with the @RestController annotation
It’s a very common use case to have Controllers implement a REST API, thus serving only JSON, XML or custom MediaType content. For >>convenience, instead of annotating all your @RequestMapping methods with @ResponseBody, you can annotate your controller Class with >>@RestController.
@RestController is a stereotype annotation that combines @ResponseBody and @Controller. More than that, it gives more meaning to your >>Controller and also may carry additional semantics in future releases of the framework.
As with regular @Controllers, a @RestController may be assisted by @ControllerAdvice or @RestControllerAdvice beans. See the the section >>called “Advising controllers with @ControllerAdvice and @RestControllerAdvice” section for more details.
Simply, the @RestContoller is combination of
- Combine @Controller and @RequestBody
- Set MediaType as JSON or XML for returning data
Below two classes will show same result
When using @RestContoller
@RestController
public class GreetingController {

    private static final String template = "Hello, %s!";
    private final AtomicLong counter = new AtomicLong();

    @RequestMapping("/greeting")
    public Greeting greeting(@RequestParam(value="name", defaultValue="World") String name) {
        return new Greeting(counter.incrementAndGet(),
                            String.format(template, name));
    }
}
When using @Contoller
@Controller
@ResponseBody
public class GreetingController {

    private static final String template = "Hello, %s!";
    private final AtomicLong counter = new AtomicLong();

    @RequestMapping("/greeting", method = RequestMethod.GET, produces = MediaType.APPLICATION_JSON_UTF8_VALUE)
    public Greeting greeting(@RequestParam(value="name", defaultValue="World") String name) {
        return new Greeting(counter.incrementAndGet(),
                            String.format(template, name));
    }
}
Creating SpringBoot REST Backend
As mentioned from first, we are going to implement following REST API
- http://localhost:8080/rest/item/create
- http://localhost:8080/rest/item/update
- http://localhost:8080/rest/item/delete
- http://localhost:8080/rest/item/read
Creating SpringBoot project
From Maven Defintion
- groupId will identify your project uniquely across all projects, so we need to enforce a naming schema. It has to follow the package name rules, what means that has to be at least as a domain name you control, and you can create as many subgroups as you want. Look at More information about package names.
eg. org.apache.maven, org.apache.commons
A good way to determine the granularity of the groupId is to use the project structure. That is, if the current project is a multiple module project, it should append a new identifier to the parent's groupId.
eg. org.apache.maven, org.apache.maven.plugins, org.apache.maven.reporting
-
artifactId is the name of the jar without version. If you created it then you can choose whatever name you want with lowercase letters and no strange symbols. If it's a third party jar you have to take the name of the jar as it's distributed.
eg. maven, commons-math
-
version if you distribute it then you can choose any typical version with numbers and dots (1.0, 1.1, 1.0.1, ...). Don't use dates as they are usually associated with SNAPSHOT (nightly) builds. If it's a third party artifact, you have to use their version number whatever it is, and as strange as it can look.
eg. 2.0, 2.0.1, 1.3.1
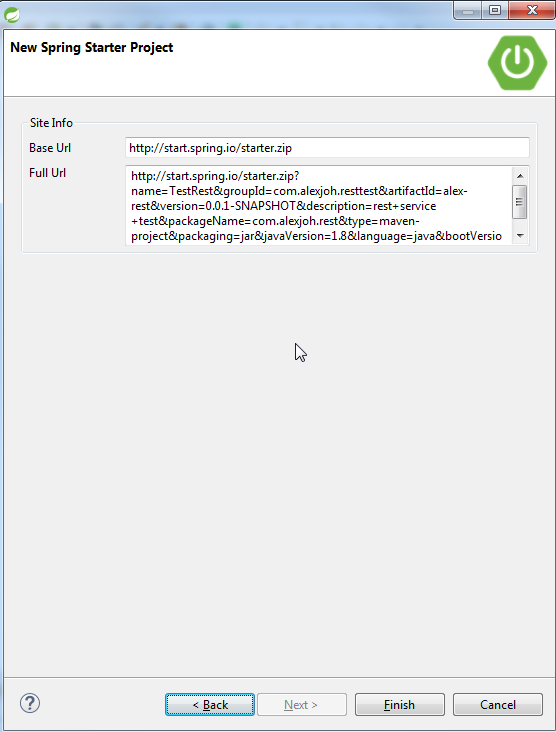
Create Project

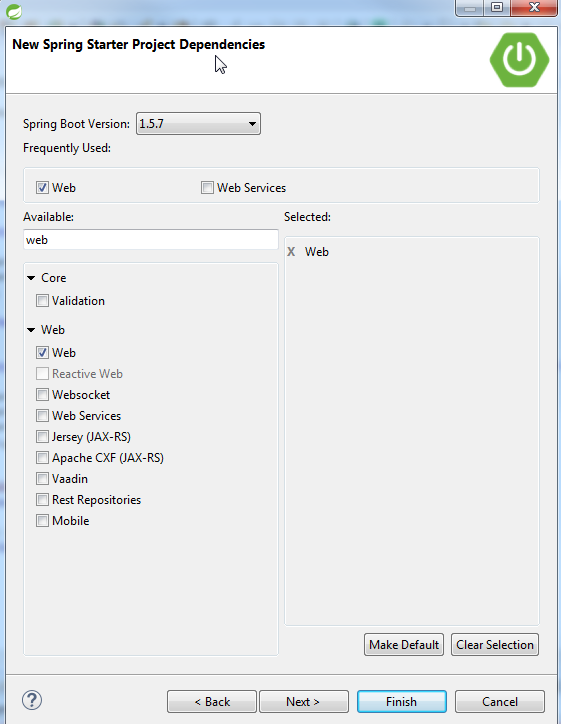
RestContoller Class
Create new class, TestRestController

Add @RestController before class definition
If the @RestControlle can't find, please check below dependency from pom.xml file
  <dependency>
   <groupId>org.springframework.boot</groupId>
   <artifactId>spring-boot-starter-web</artifactId>
  </dependency>

Filename: TestRestController.java
package com.alexjoh.rest;

import org.springframework.web.bind.annotation.RequestMapping;
import org.springframework.web.bind.annotation.RequestMethod;
import org.springframework.web.bind.annotation.RequestParam;
import org.springframework.web.bind.annotation.RestController;

@RestController
public class TestRestController {

 @RequestMapping(value = "/rest/item/create", method = RequestMethod.POST)
 public String createItem() {
  return "Item is Created";
 }

 @RequestMapping(value = "/rest/item", method = RequestMethod.GET)
 public String getItem() {
  return "Retrieve item";
 }

 @RequestMapping(value = "/rest/item/delete", method = RequestMethod.DELETE)
 public String deleteItem() {
  return "Item is Deleted";
 }

 @RequestMapping(value = "/rest/item/update", method = RequestMethod.PUT)
 public String updateItem() {
  return "Item is Updated";
 }

}
Item Object
Creating AngularJS for Front
Please refer how to setup Angular CLI and how to create Angular template from CLI.
- Go to the root folder of the project
D:\spring\projects\TestRest>dir
 Volume in drive D has no label.
 Volume Serial Number is D8A7-163B

 Directory of D:\spring\projects\TestRest

09/19/2017  10:49 AM    <DIR>          .
09/19/2017  10:49 AM    <DIR>          ..
09/19/2017  10:49 AM             1,226 .classpath
09/19/2017  10:49 AM               249 .gitignore
09/19/2017  10:49 AM    <DIR>          .mvn
09/19/2017  10:49 AM             1,127 .project
09/19/2017  10:49 AM    <DIR>          .settings
09/19/2017  10:49 AM             6,468 mvnw
09/19/2017  10:49 AM             4,994 mvnw.cmd
09/19/2017  10:49 AM             1,417 pom.xml
09/19/2017  10:49 AM    <DIR>          src
09/19/2017  10:51 AM    <DIR>          target
               6 File(s)         15,481 bytes
               6 Dir(s)  572,521,115,648 bytes free

D:\spring\projects\TestRest>
- Create UI project using Angular CLI
D:\spring\projects\TestRest>dir
 Volume in drive D has no label.
 Volume Serial Number is D8A7-163B

 Directory of D:\spring\projects\TestRest

09/19/2017  10:49 AM    <DIR>          .
09/19/2017  10:49 AM    <DIR>          ..
09/19/2017  10:49 AM             1,226 .classpath
09/19/2017  10:49 AM               249 .gitignore
09/19/2017  10:49 AM    <DIR>          .mvn
09/19/2017  10:49 AM             1,127 .project
09/19/2017  10:49 AM    <DIR>          .settings
09/19/2017  10:49 AM             6,468 mvnw
09/19/2017  10:49 AM             4,994 mvnw.cmd
09/19/2017  10:49 AM             1,417 pom.xml
09/19/2017  10:49 AM    <DIR>          src
09/19/2017  10:51 AM    <DIR>          target
               6 File(s)         15,481 bytes
               6 Dir(s)  572,521,115,648 bytes free

D:\spring\projects\TestRest>
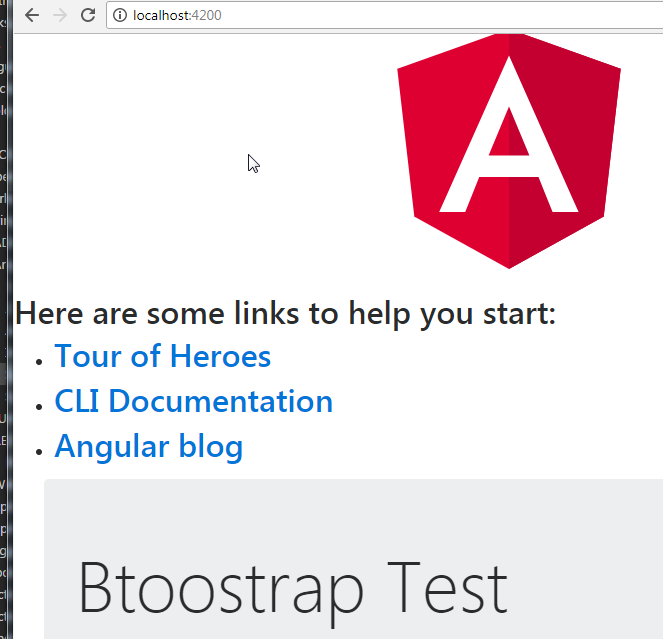
- Test Webpage Angular by runing ng serve

- Adding Bootstrap using NPM
D:\spring\projects\TestRest\UI>npm install --save bootstrap@4.0.0-alpha.6 font-awesome
npm WARN optional SKIPPING OPTIONAL DEPENDENCY: fsevents@1.1.2 (node_modules\fsevents):
npm WARN notsup SKIPPING OPTIONAL DEPENDENCY: Unsupported platform for fsevents@1.1.2: wanted {"os":"darwin","arch":"any"} (current: {"os":"win32","arch":"x64"})

+ bootstrap@4.0.0-alpha.6
+ font-awesome@4.7.0
added 118 packages in 17.434s

D:\spring\projects\TestRest\UI>
Update all components which described from Tutorial 1. If you don't know how to do it, please look at below blog and video.
List of files to be updated;
- .angular-cli.json
- polyfills.ts
- app.component.html
Linking Angular to SpringBoot Tomcat
Angular CLI uses Webpack technology. The webpack will put all CSS and Javascript files into static files. To do this, we will need to change the output directory from Angular CLI configuration file.
filename: .angular-cli.json
   "apps": [{
        "root": "src",
        "outDir": "../src/main/resources/static",
        "assets": [
            "assets",
            "favicon.ico"
        ],
After compiling from Maven, the compiled webpack files will be added under resources\static folder.
For this, update pom.xml file to run Angular CLI
 <build>
  <plugins>
   <plugin>
    <groupId>org.springframework.boot</groupId>
    <artifactId>spring-boot-maven-plugin</artifactId>
   </plugin>
   <plugin>
    <groupId>org.apache.maven.plugins</groupId>
    <artifactId>maven-compiler-plugin</artifactId>
    <configuration>
     <source>1.8</source>
     <target>1.8</target>
    </configuration>
   </plugin>
   <plugin>
    <groupId>com.github.eirslett</groupId>
    <artifactId>frontend-maven-plugin</artifactId>
    <version>1.2</version>
    <configuration>
     <workingDirectory>ui</workingDirectory>
    </configuration>
    <executions>
     <execution>
      <id>install node and npm</id>
      <goals>
       <goal>install-node-and-npm</goal>
      </goals>
      <configuration>
       <nodeVersion>v6.11.2</nodeVersion>
       <npmVersion>5.3.0</npmVersion>
      </configuration>
     </execution>
     <execution>
      <id>npm install</id>
      <goals>
       <goal>npm</goal>
      </goals>
      <configuration>
       <arguments>install</arguments>
      </configuration>
     </execution>
     <execution>
      <id>npm build</id>
      <goals>
       <goal>npm</goal>
      </goals>
      <configuration>
       <arguments>run build</arguments>
      </configuration>
     </execution>
    </executions>
   </plugin>
  </plugins>
 </build>
Please make sure the workingDirectory has right path and update Maven Project if necessary.
To build as one package, run "install" command from Maven.
D:\spring\projects\TestRest>mvn clean install
[INFO] Scanning for projects...
[INFO]
[INFO] ------------------------------------------------------------------------
[INFO] Building TestRest 0.0.1-SNAPSHOT
[INFO] ------------------------------------------------------------------------
[INFO]
[INFO] --- maven-clean-plugin:2.6.1:clean (default-clean) @ alex-rest ---
[INFO] Deleting D:\spring\projects\TestRest\target

Running from SpringBoot tomcat server (http://localhost:8080)

Summary
We've learned how to run AngularJS and Spring Boot from Tomcat server. Still, you can run front end and back end as separate instance, but I would like to show how you can run these two components from one web server. There is Youtube video entire step for this, so please go to Youtube if you want to watch step-by-step.


Comments
Post a Comment